Flip Joint
Overview
Flip Joint flips an assembly joint by toggling the joint’s flip setting. This is useful for quickly reversing the direction/orientation of a connection when a component is connected “the wrong way” or when you need to test alternate configurations.
On the Inventor Edit Joint dialog box, this is equivalent to picking the Flip Component toggle button under "Connect".
How It Works
- Select a component occurrence (to expose/select its joints).
- Select the joint you want to flip.
- The joint is flipped, reversing its orientation.
Usage Instructions
- Open your assembly in Inventor.
- Click Flip Joint in the Placement panel.
- Select the component and then the joint to flip when prompted.
- Verify the joint/component updates as expected.
Troubleshooting
- No joints available: Ensure the selected component has joints.
- Result not as expected: Flip affects the joint connection; review joint settings if the assembly becomes over-constrained.
- Movement blocked: Grounding/constraints may prevent the flipped pose; resolve constraint conflicts if needed.
Examples
On the Inventor Edit Joint dialog box, this is equivalent to picking the Flip Component toggle button under "Connect."
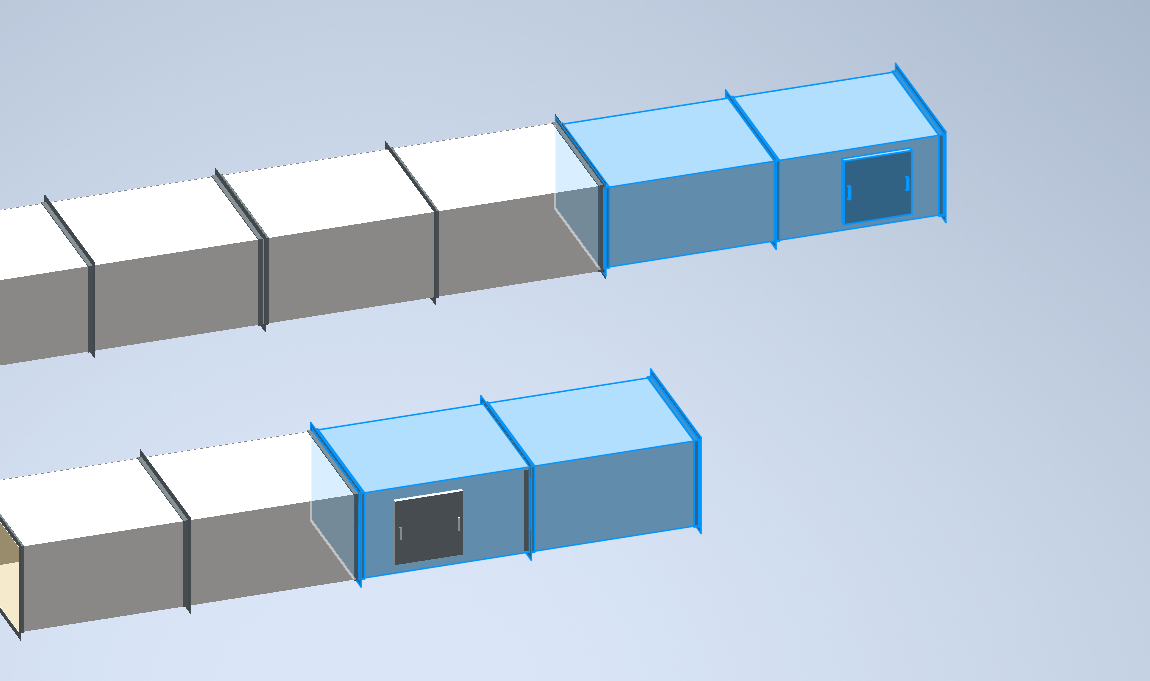
In the snip below, the duct with the clean out door is selected and the left joint is picked. The result is the joint (and duct) is flipped overlapping the ductwork to the left.